Yoast SEO is one of the best SEO plugins available. It is easy to use and delivers results. If you are creating content online, you will undoubatly benefit from using an SEO plugin, and I would hightly reccommend Yoast.
Installing and using the Yoast plugin is a quick and easy task. In this article we will go over how to get it installed. Then we will go over some of the basics of the plugin. By the time we’re done you will be ready to start optimizing your digital content for search engines! Let’s get going…
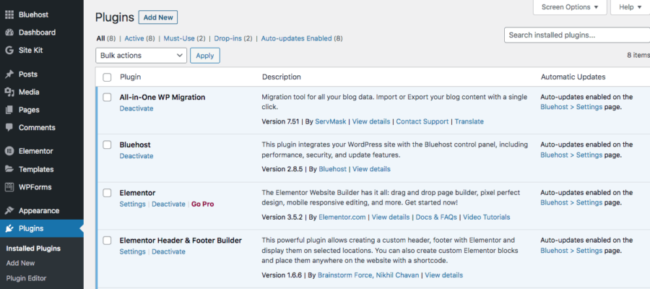
The first thing you want to do is click on “plugins.” This will be located on the left had menu of your WordPress menu. You can see it is highlighted in blue in the below image.
Once you’ve clicked that you will be on the plugins page. At the very top you will see “Add new.” Click on that.
Once you’ve clicked “add new” you will be taken to the page where you can download plugins. Do a search for “Yoast.” You can see what the plugin will look like below.
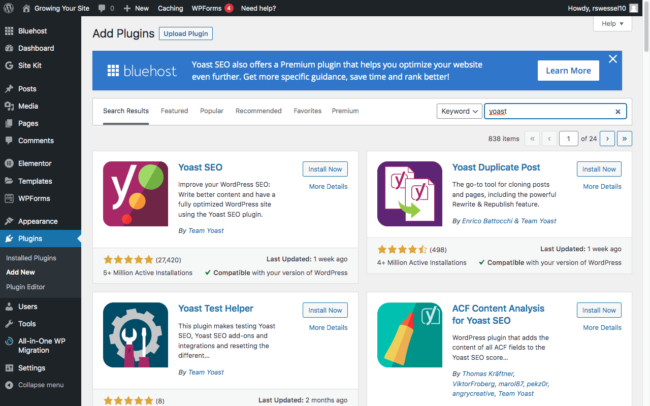
Once you’ve found the plugin click “install now.”
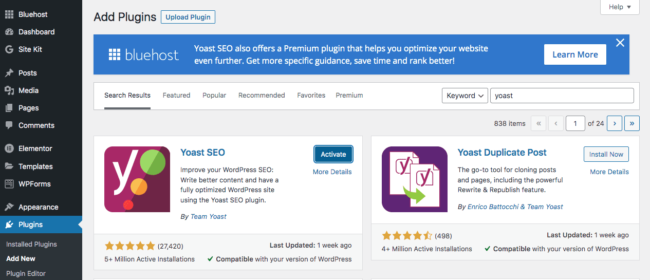
Once it’s installed it will turn blue. Click “activate.”
Once it’s activated you can navigate back to your installed plugins and you will see it listed.
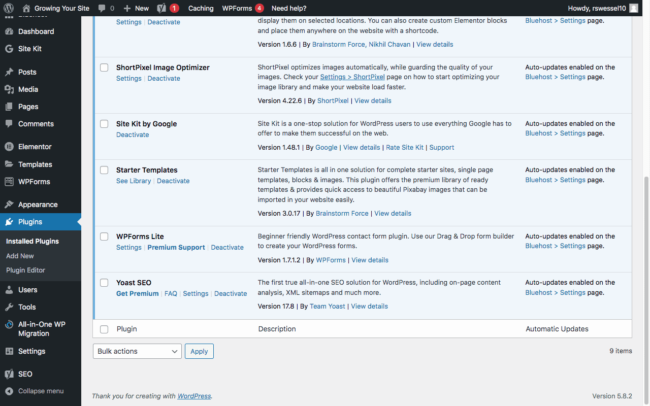
You will also see a new tab that says “Y SEO.” This will take you to the Yoast dashboard. You can see it highlighted blue on the bottom, left-hand of the image below.
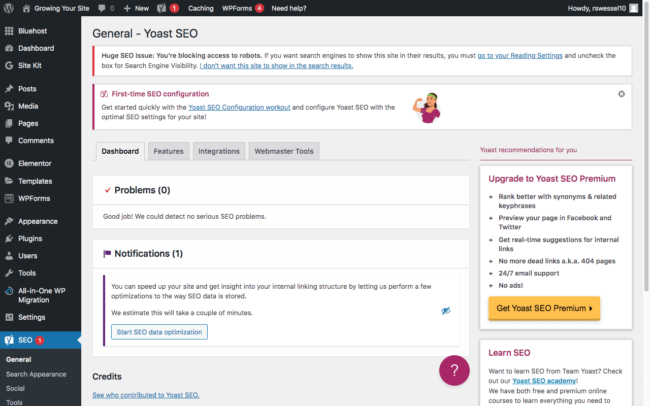
If you click on that, you will be taken to the Yoast dashboard in WordPress. You can see I have a “Huge SEO issue” that needs to be cleaned up. Below that you will see “First-time SEO configuration.” Go ahead and click on that.
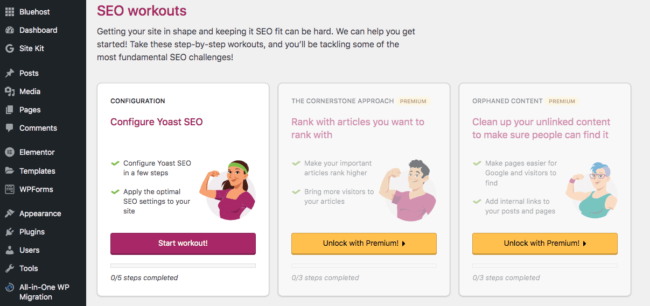
Yoast Workouts
Once you’ve clicked on “first-time SEO configuration” you will be taken to SEO workouts. You should do the first one titles “Configure Toast SEO.” Go ahead and click on it.
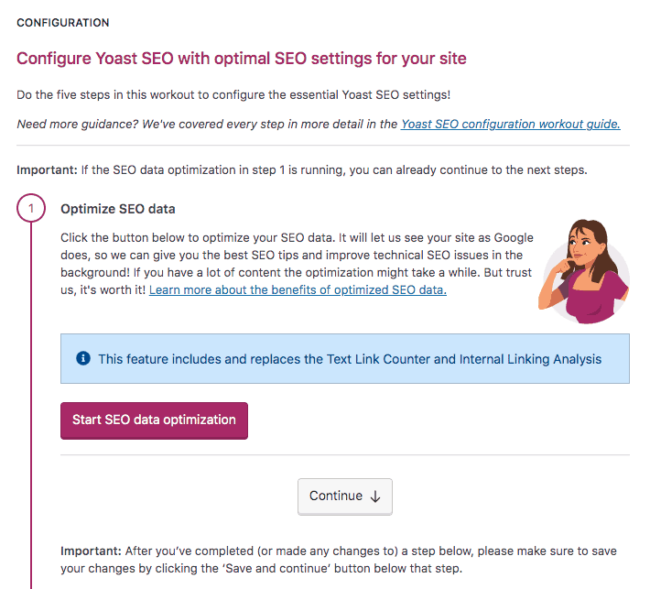
Once you click on “start workout.” You will then be asked to configure Yoast SEO. Scroll down a bit and click “start SEO data optimization.
Once the optimization is complete, you will get a message saying so. On to step 2.

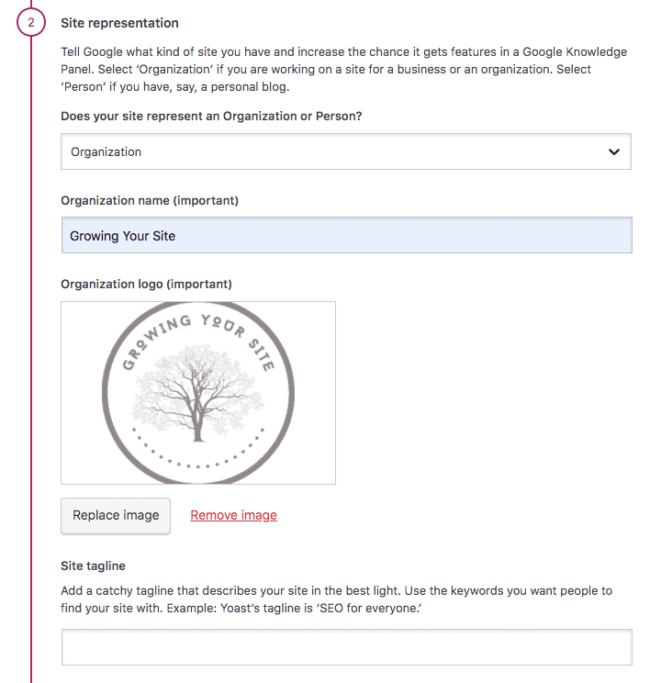
Step 2 just asks for some basic information about your site. You are also able to upload your logo here. Fill out the information and were on to step 3.
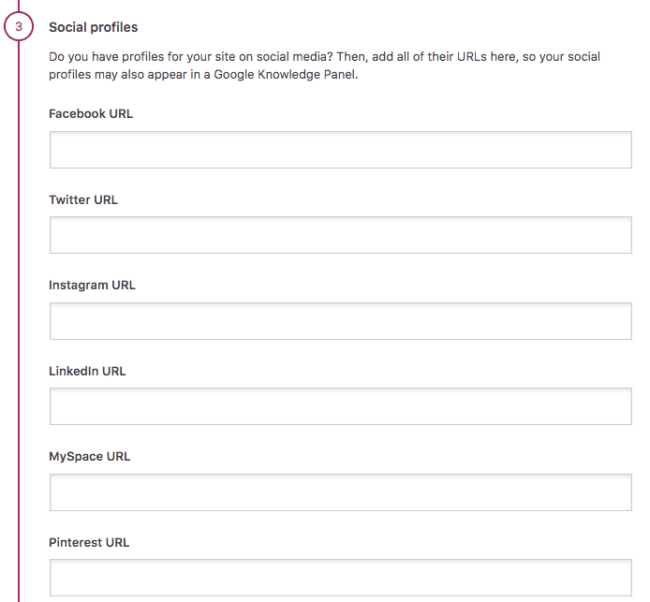
Step 3 is linking your social profiles. If you have some, add the URLs here. If you don’t have any yet, just mve on to step 4.
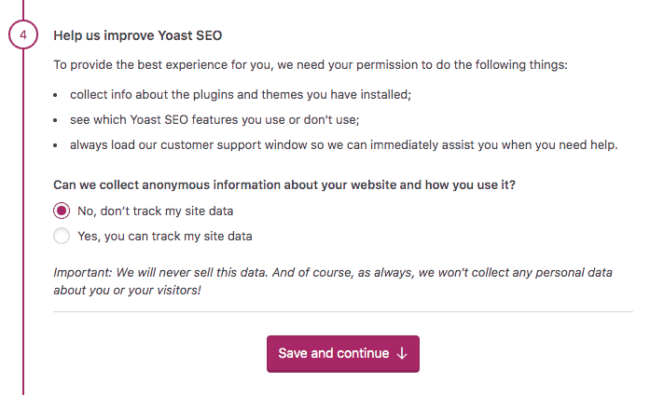
Step 4 is just Yoast asking you to help them by letting them track your data. I wasn’t feeling very helpful today, so I clicked no. You can click either yes or no, it won’t make any difference in the plugins performance.
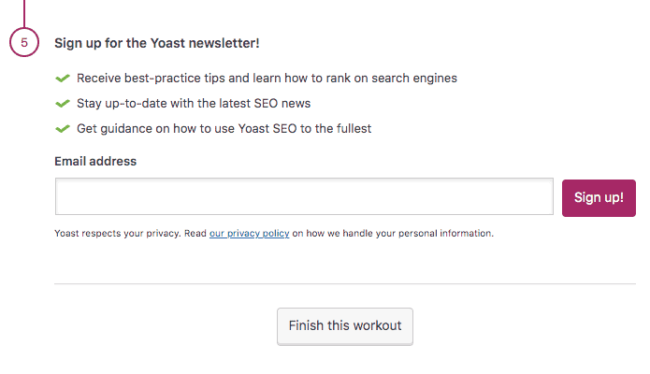
The final step is signing up for the newsletter. Enter your e-mail, sign up and click “finish workout.”
Congratulations! You have successfully installed and set up your Yoast. Now we can take a look at how it works.

Using the Yoast Plugin
When you go into a post, it will probably look something like the image below. If you look at the very bottom, you will see something that says Yoast SEA. Go ahead and scroll down there.
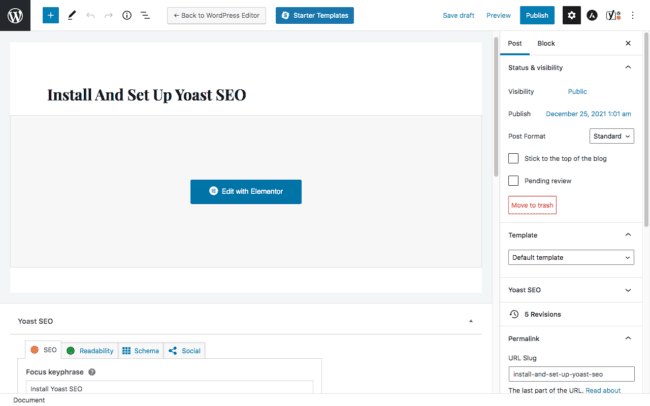
Now that you’ve scrolled down, you have a better look at what’s going on. It can appear a little intimidating at first, but we will go through everything.
At the very top you see tabs for: SEO, readability, schema and social. We’ll look at each of them, but for now we’ll focus on the SEO tab.
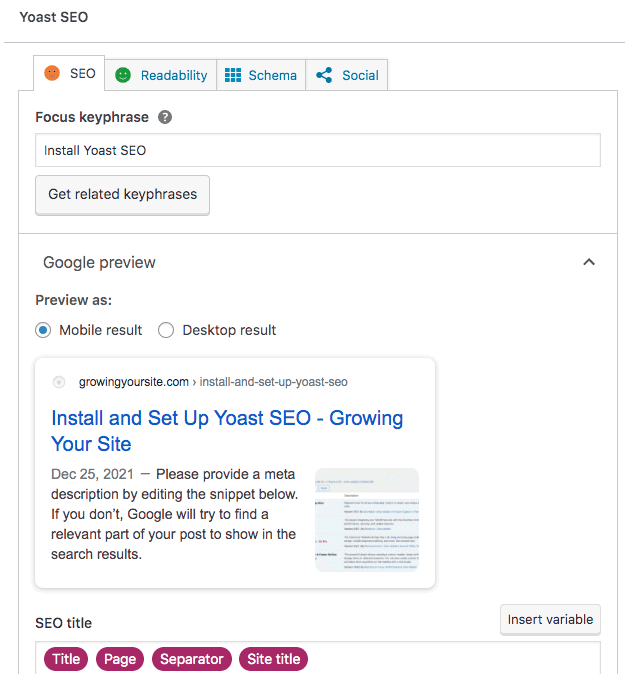
The first section in the SEO tab is your focus keyword. This is where you will enter the keyword or phrase you are targeting. As an example, I made “install Yoast SEO” my keyword. I will probably change this, but it works for the example.
If you are just starting out, I would recommend you use long-tail keyword. For this post, I will never earn a top ranking for SEO or Toast. But for install Yoast SEO… who knows. Again, I will probably change this so it’s a little more targeted.

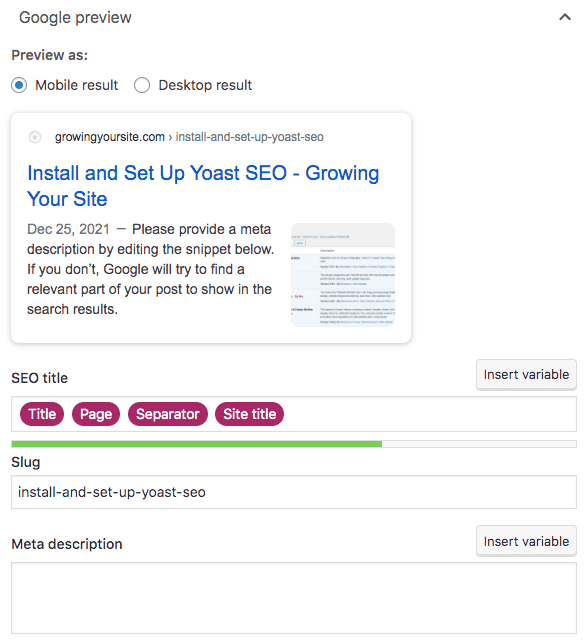
Moving on to the next section we have Google preview. This is how your article will show up in the Google search results. Google is going to be prioritizing mobile, so i’d recommend leaving it on mobile view. You can always adjust it for desktop afterwards.
Below the graphic of how our search result will look you’ll see something that says SEO title. There will be some red boxes below that.
If you look at what the picture shows you will see those red boxes say: Title, Page, Separator, Site tile. If you look at the graphic depiction of how the post will look, you can see those things displayed. You can change those as you see fit.
Below the SEO title section is the slug. This is how your post will show up. I’d recommend just leaving that how it is. Changing the slug changes the location of your post.
Finally, there is meta description. The meta description is what will show up under the title of your article on Google search. For most of my meta descriptions I like to do a short summary of my first paragraph. That is often the most direct information on the topic.
It’s a good idea to just do a couple Google searches. They don’t have to be for anything spacific. But look at how the title is displayed. Pay attention to the meta descriptions. Get a feel for how you want your results to be presented.
Once we get the meta description in we move down to the SEO analysis. The first part of this is the analysis problems. As you can see, the SEO for this post will need some work before it is finished. This section is useful because you can see what you can do to give your article the best chance at ranking higher in search engines.
For my results, you can see I need both internal and internal links added to my article. This shouldn’t be a problem. This site has multiple SEO articles that talk about Yoast, so I can go into those and link this how-to article. As for external links, the article is about a specific service. That will be a good place to start. Linking to any stats or data is also a good idea.
I had talked a little earlier about my keyword (keyphrase) and you can see it isn’t really working out for me. You want to have your keywords or keyphrases in the article and I am not accomplishing that here. It may be time to take a look at that.
* It is important to note that you do want your keyword or keyphrase in multiple places within your article, but only where it fits. Do not try to force it in somewhere. Search engines do not like that. It is called keyword stufffing, and they will punish you for it. Add the leyworks where they fit and that’s good enough.
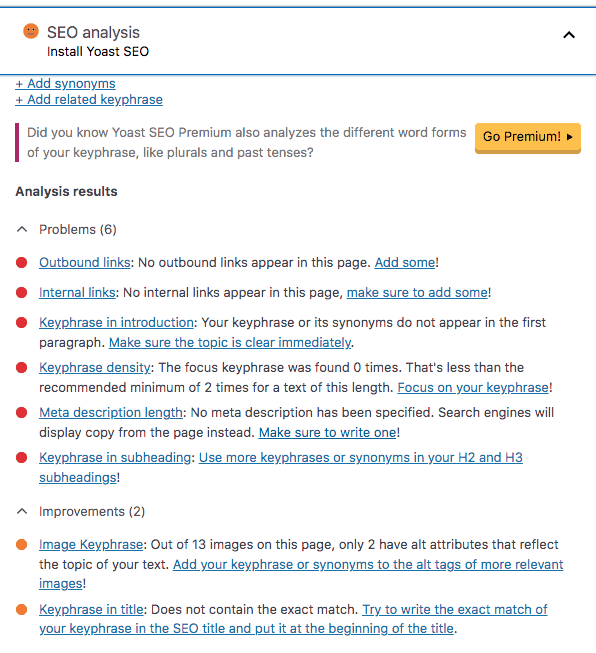
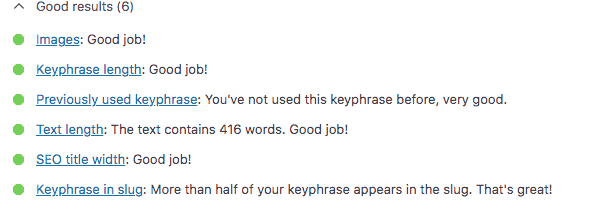
After I got beat up with my problem areas, at least they make me feel a little better by telling me what I did right. Between the problem areas and then areas I did good in, you can get a pretty good idea of what needs to be in your article. If you have a couple keywords planned out before writing, it can save you some work later.
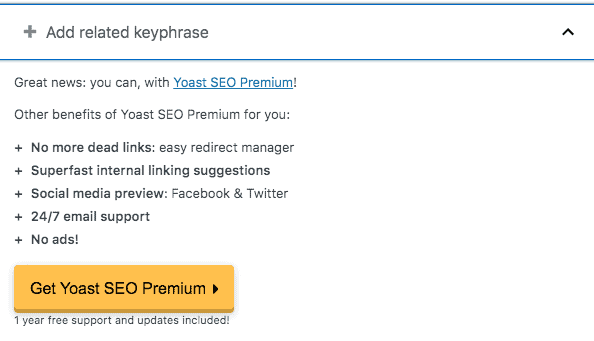
Next we have a little plug for the premium service. Right now I am using the free version, but the premium version does have some added benefits. The one I like the most would be adding more keywords or keyphrases. One is fine, but it is a lot better to target multiple words or phrases. You want to give yourself the best chance at ranking and targeting multiple keywords is a good strategy.
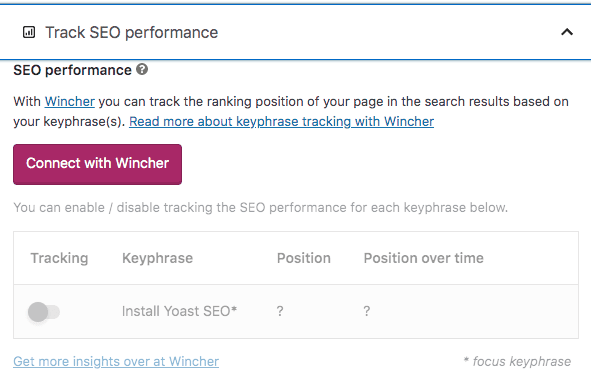
Scrolling down to the “track SEO performance” section we have the option to connect our accounts with Wincher. Wincher is a service that tracks the performance of all of your keywords. If you have a lot of articles and keywords, this is a good tool to use. Being able to find and modify underperforming keywords can have big benefits to the performance of that piece. For most of the smaller or newer blogs, you can skip this for now because there would be a limited benefit.
Moving on to cornerstone content. Cornerstone content is your most important stuff. They are articles that most of you other content kind of circles around. These will have more views, internal links and backlinks than your other content.

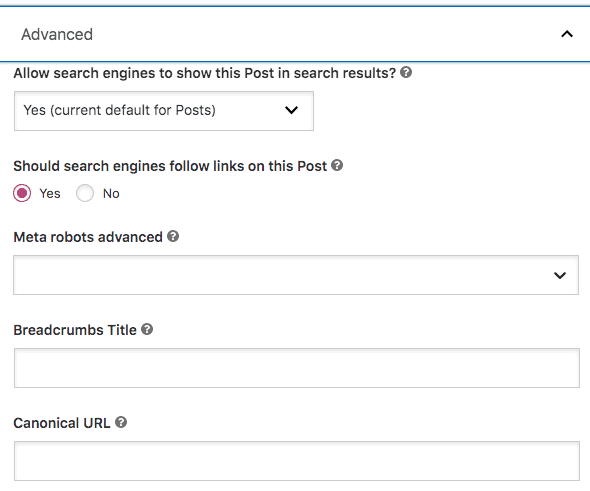
In the “advanced” section we have a couple boxes where we can add some data. For the most part, just leave this how it is. The default settings work in 99% of cases. The only one you would ever really need to play with is the breadcrumbs. If you aren’t sure what those are, this Yoast post does a good job explaining it.
And with that, we are done with the SEO tab. Now it’s on to readability.
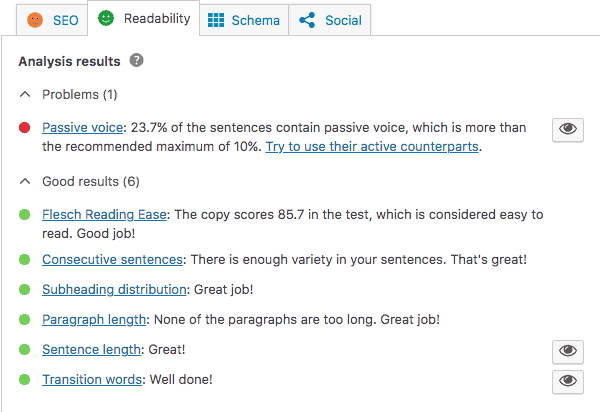
The second tab in Yoast is the “readability” tab. This tells you how easy your article is to read. It also gives some suggestions on how to improve it. As you can see, I use way too much passive voice. This is a constant struggle of mine. I need to pay more attention and work on this more.
That’s it for readability. Time to move on to the schema tab.
The schema tab may be used on occasion, but you won’t be using it every day. In here, you can define kind of page or article type it is. For the most part, the default settings are perfect. There are a couple exceptions, which we will look at next.
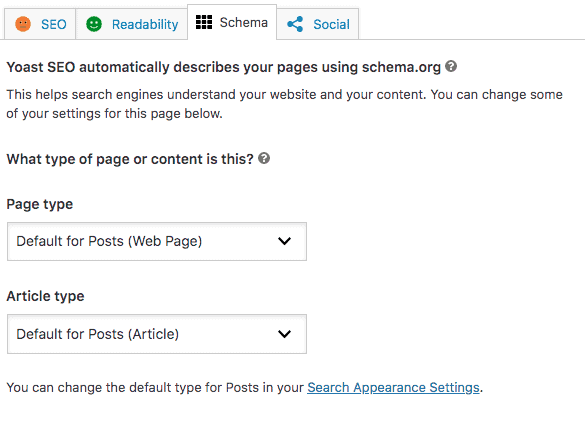
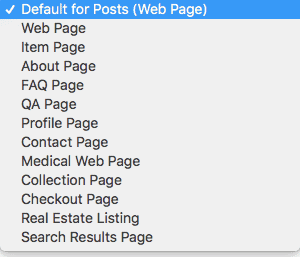
Under “page type” you can just leave it as the default unless you are creating something like a contact or FAG page. For any kind of article or blog post, the default setting is good.
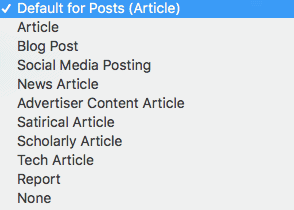
For the article type, default is also just fine. Even most blog posts are categorized as articles. You will rarely find the need to change this.
The final tab is the “social” tab. This one is pretty easy because its a premium feature. If you have premium, you can come here and see how your article would look as a Facebook or Twitter post. If you don’t have the premium version, there is no need to click on this tab.
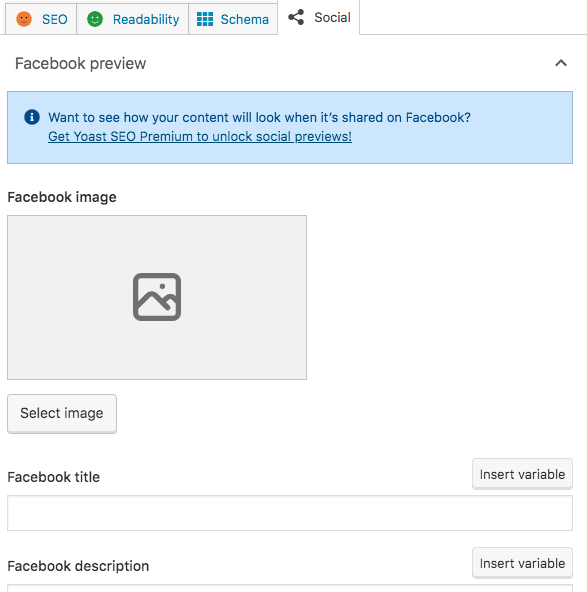
There it is...
By now you should be able to install the Yoast SEO plugin and get started. At first it can seem like there is a lot going on, but once you get going, it isn’t so bad. Don’t become hyper focused on getting a perfect score with the plugin. I’m not sure they have ranked any of my posts as perfect. That’s ok. Just make sure you are paying attention to a couple of big the big things: Keywords, internal links and external links, meta description, etc. As you progress, you will find it becomes much easier to write content that is SEO friendly right away. Then all thats left is adding that information to the Yoast Plugin and waiting for all that search engine traffic to start coming in!
Good luck out there!


